


Cleaning frequency
At minimum, wipe flange faces and wheel seating surfaces every wheel change, and clean splash guards and nozzle tips daily. If you grind cast iron, fines build fast; they also migrate into clamping interfaces.

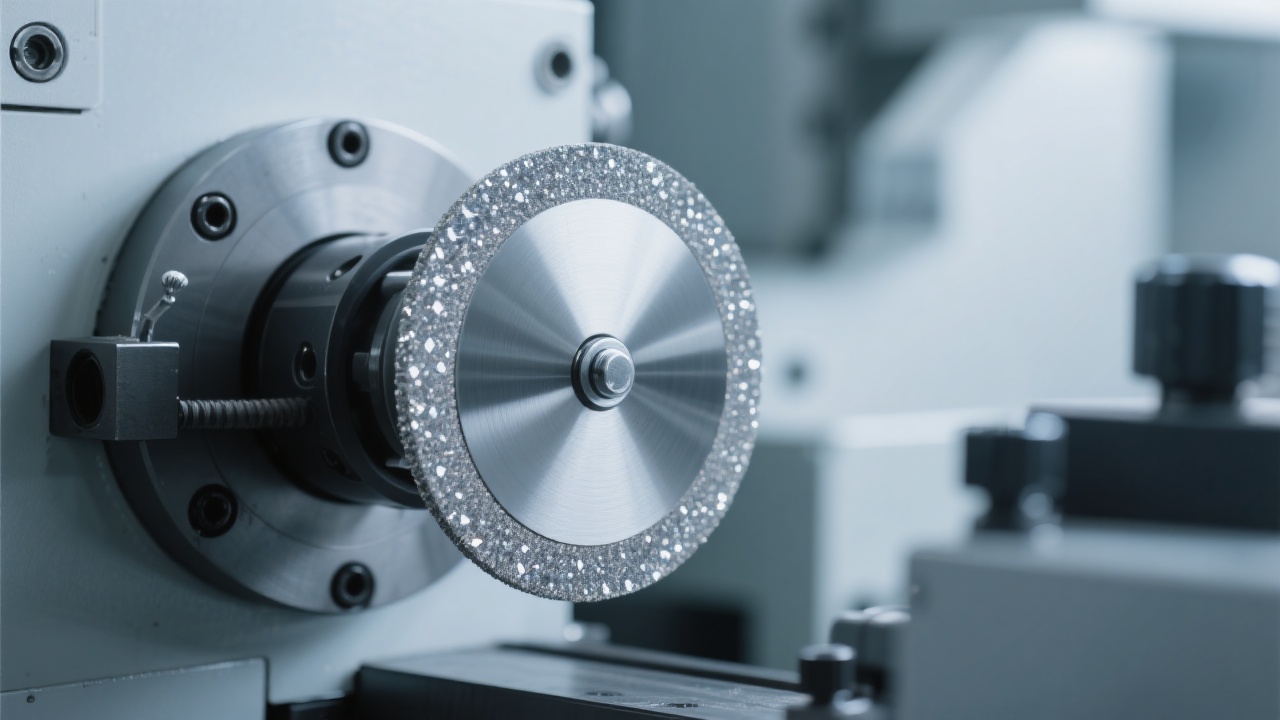
If you’re using a high-performance brazed diamond grinding wheel on ductile iron, gray iron, or technical ceramics, your real bottleneck is rarely “wheel quality” alone—it’s installation accuracy, balance, torque discipline, and coolant hygiene. Get these right and you typically see 10–25% higher stable material removal and a meaningful drop in diamond grain pull-out and unplanned stoppages.
Why the YOUDE 400 Series matters: It uses vacuum brazing distribution technology to keep diamonds exposed and sharp while improving grain retention—helping you grind aggressively without “mysterious” de-sanding when parameters are correct.
Before you touch the flange, align the wheel specification with your workpiece and grinding machine. When the wheel is “wrong-but-runs,” you often compensate with pressure and speed—and that’s when thermal stress and grain loss start to show up.
| Workpiece | Typical wheel choice (starting point) | What you optimize |
|---|---|---|
| Ductile iron (QT) | Medium grit (D46–D64), stronger bond exposure | Stable stock removal + lower edge chipping |
| Gray iron (HT) | Medium-to-coarse grit (D64–D91) | Fast cutting + less loading |
| Ceramics / hard brittle materials | Finer grit (D30–D46), controlled feed | Surface finish + crack risk reduction |
As a reference for many industrial setups, keeping wheel runout controlled can deliver immediate gains. If you bring radial runout down toward ≤ 0.02–0.03 mm (machine and arbor dependent), you typically reduce vibration-driven grain loss and stabilize your finish. If your process can only hold 0.05 mm+, your “de-sanding” complaints may actually be a dynamic load problem.

Installation is not a “mount-and-go” task. The 400 series wheel can only show its sharpness and retention if you eliminate three silent killers: dirty flange faces, misalignment, and over/under torque.
Practical note: If your operator says “it feels fine” but you see micro-chatter on the surface, treat it as data. Minor imbalance that’s invisible at idle can become a serious issue once the wheel hits its working RPM and the contact zone heats up.
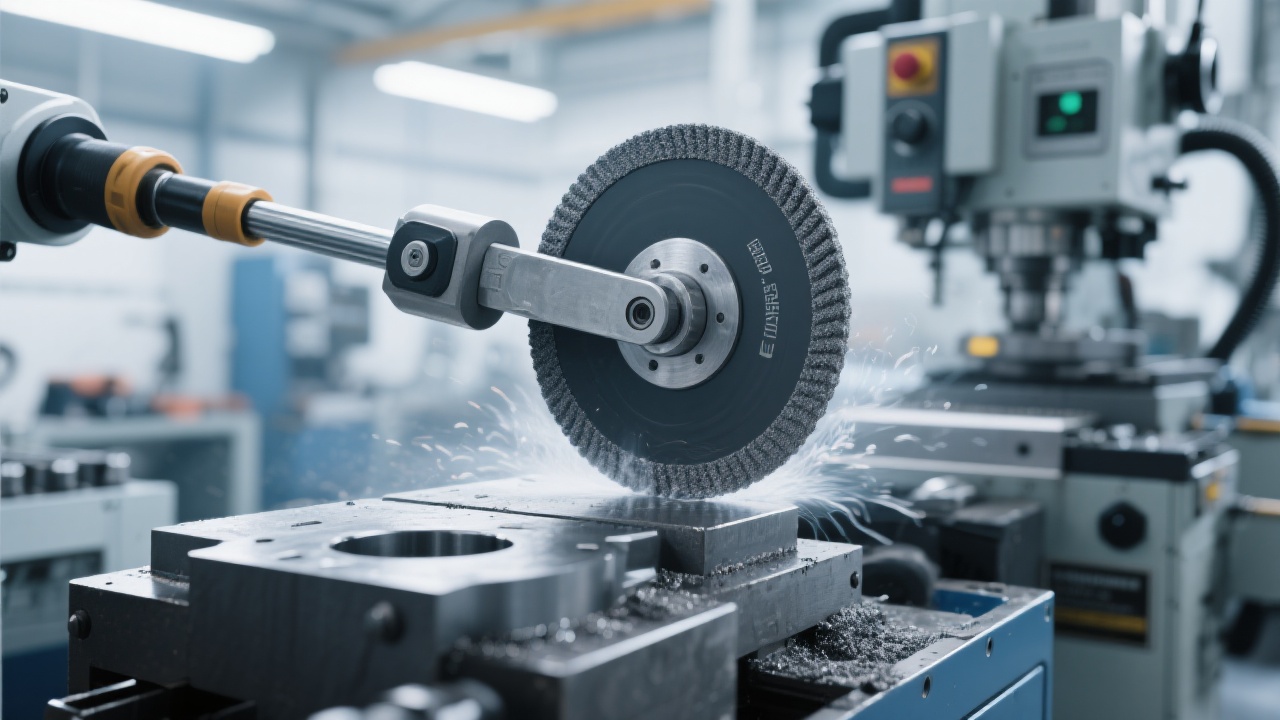
When a brazed diamond wheel “drops grains,” it’s rarely random. Most cases are caused by localized overload—mechanical or thermal—repeating at the same area of the wheel due to installation or coolant problems.
Too high feed with insufficient coolant volume or poor nozzle targeting creates a hot zone. The brazed layer experiences cyclic thermal shock, and grains loosen earlier.
What you do: stabilize coolant flow (many lines run 20–60 L/min depending on wheel width/contact length), aim nozzle precisely at the contact arc, and avoid “air cutting” that heats without material removal.
Even a small runout can create repeated impact loading every rotation, which accelerates grain loss and makes vibration “mysteriously” worse over time.
What you do: re-clean flange faces, re-seat, re-torque in a star pattern, then re-check runout and balance before production.
Dirty coolant recirculates iron fines and hard particles into the grinding zone. That turns your process into uncontrolled three-body abrasion—raising heat and grinding forces.
What you do: add filtration (magnetic separator + paper band filter where possible), and keep concentration stable. A conductivity/refractometer check per shift is often enough to catch drift early.
Expert viewpoint (shop-floor rule): “If the wheel is sharp but still burns the part, assume coolant delivery and contact stability first. Parameter changes come second.”
The fastest way to protect wheel life is to recognize abnormal signals early. Don’t wait until the wheel is “visibly damaged.” Your machine gives you warnings—vibration, sound, surface pattern, and temperature marks.
| Symptom | Likely cause | Action you take (in order) |
|---|---|---|
| Vibration increases after 10–30 min | Thermal growth, imbalance, runout, wheel loading | Check coolant targeting → measure runout hot/cold → re-balance if needed → reduce infeed peaks |
| Burn marks / surface discoloration | Insufficient coolant, too high specific energy, dulling/loading | Increase flow/pressure → optimize feed/speed ratio → improve filtration → verify wheel grit suitability |
| Abnormal sharp “ringing” noise | Resonance, loose mounting, bearing issue | Stop → verify torque + flange contact → check spindle bearings → re-test at incremental RPM |
| Fast grain pull-out in one sector | Single-point overload due to runout or misalignment | Measure runout → correct seating → check workholding alignment → confirm stable contact length |
If your line tracks OEE, treat wheel issues as a controllable loss category. A realistic target after standardizing installation and coolant checks is reducing wheel-related downtime by 15–35% in 4–8 weeks, depending on how chaotic the baseline is.
You don’t need “more maintenance.” You need repeatable micro-routines that prevent heat spikes and impact loading—two conditions that increase de-sanding risk even for premium brazed wheels.
At minimum, wipe flange faces and wheel seating surfaces every wheel change, and clean splash guards and nozzle tips daily. If you grind cast iron, fines build fast; they also migrate into clamping interfaces.
Store wheels in a dry, stable environment. Avoid stacking that can distort bodies or damage edges. A practical window is 15–30°C and <60% RH with protected packaging to keep dust out.
Track three numbers: parts per wheel, average cycle time, and surface reject rate. Replace or re-evaluate the setup when you see a sustained cycle-time increase of 8–12% or surface defects trending upward—this often appears before visible wheel damage.
One customer running ductile iron components was experiencing early grain pull-out and unstable finish. After implementing a simple standard work—flange cleaning at every change, dial-indicator runout verification, star-pattern torquing, and coolant filtration checks—their average wheel life improved by about 30% over the next month. Just as important, unplanned stops dropped because vibration issues were caught during the test run instead of during production.
“We didn’t change the machine—only the discipline: runout measurement, balancing, and coolant cleanliness. The 400 series stayed sharp and consistent, and the de-sanding complaints basically disappeared.”
Check coolant delivery (flow + targeting + filtration) before changing parameters. Burning with a sharp wheel often means heat is not being removed at the contact zone.
Don’t. Stop and verify torque, flange seating, and balance. Resonance can escalate quickly and accelerate grain pull-out and spindle wear.
Tell us what you’re seeing—de-sanding, burning, vibration, short wheel life, or unstable finish—and include your workpiece material, wheel size/grit, RPM, and coolant type. You’ll get a more accurate fix faster.
If you want the “sharp but not de-sanding” performance consistently, you need the right wheel geometry, grit plan, and process window for your material. The YOUDE 400 Series with vacuum brazing distribution is built for high-efficiency grinding—let’s make it fit your exact application.
Explore YOUDE 400 Series Brazed Diamond Wheel Custom SolutionsRecommended for: ductile iron, gray iron, ceramic grinding lines seeking higher MRR, lower scrap, and longer stable wheel life.

.png?x-oss-process=image/resize,h_1000,m_lfit/format,webp)

.png?x-oss-process=image/resize,h_1000,m_lfit/format,webp)


